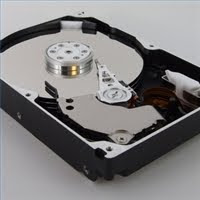
 Hard drives contain the data on almost every computer made for the last 20 years. Prior to that, most computers stored their data on floppy disks, magnetic tapes or even punched cards. Drive capacity has increased exponentially while prices have continued to drop, allowing most modern computers to hold vast amounts of information. When a hard drive crashes, it usually takes all that information with it. Recovering that information can range in importance from helpful to critical, depending upon what was stored. When a back-up is not available, data recovery comes into play.
Narrow Down the Problem
1. Boot the computer and enter into the BIOS setup screen. The particular key used varies by system, but it is often the Delete, F2 or F10 key. Watch for an indication of which key to press on the first screen that appears after turning on the power.
2. Check the hard drive information in the BIOS to make sure that the computer is recognizing the hard drive for the proper capacity. This varies by manufacturer, but is often found under "Standard Options," where the hard drives, floppy drives, system memory, date and time are stored. Make sure the information listed for the hard drive matches the installed hard drive information as found on the label.
3. Detect the hard drive using the autodetection feature of the BIOS set-up program. This will vary by computer, but it is often a matter of pressing "Enter" when the cursor is located on the primary hard drive location.
4. Save changes to the BIOS setup and reboot. If the system still doesn't recognize the hard drive, power down and replace the data cable with a spare cable to see if it is a bad cable causing the problems.
5. Reboot the computer to see if the hard drive is now working. Use a Second Computer for Data Recovery.
6. Attach the hard drive to a second computer as a secondary drive. This can be done by powering down the secondary computer and hooking up the power cable and then attaching the data cable to a spare SATA port on the motherboard, or in the case of IDE drives, connecting the drive to the data cable that goes to the CD ROM drive.
7. Boot the computer and check to see if the hard drive shows up as a new device under the operating system. This will vary by operating system, but as an example, in Windows XP, this can be done by opening "My Computer" and looking for local hard disks.
8. Perform a full back-up or copy important files, storing the recovered information onto an external source such as the C: drive of the host computer, a network location or onto an external device such as an external USB hard drive or flash drive.
9. Run the error checking utility on the hard drive by opening My Computer and right-clicking on the drive, then selecting "Tools" and clicking on "Check Now" in the error checking section if the data is still not accessible.
10. Install a data recovery program or contact a data recovery specialist if these steps do not work or if the information on the hard drive is extremely valuable.
Bad hard drives are common errors for all computers. Folks should note this and learn to protect the data like a glass by backing up online. I personally backup online at www.safecopybackup.com. They have 3GB free trial. It's a great experience and a saviour I should say.
ReplyDelete