Computer, Technology, Hardware, Software, Troubleshooting, Tutorial, Server, Printer, Cisco, Network, Microtic, Laptop

Showing posts with label How To. Show all posts

Monday, 15 February 2016

Tattoo Serial Number PC HP Compaq 6005 Pro MT


how to change serial number when system board is replaced
Here is what you need to do :
  1. Enter the BIOS | Press F10.
  2. Go to the Security Tab
  3. Navigate to the menu option "System IDs" and press Ctrl + A.
  4. Press Enter.
  5. Enter New Serial Number on the menu "Enter Chassis Serial #" and "Enter Asset Tag" and then press F10 to save.
  6. Finish

Thursday, 4 February 2016

How To Fix Keyboard Laptop


First identify the problem on your laptop keyboard.

 The first thing you need to find out is, Are you still lit keyboard? How many of the buttons still work? If some buttons could work and others do not, this problem could be mechanical problems. Is not there a button to respond? Press Caps Lock to see whether it is the main indicator lights on or off. If the light associated with each key does not live immediately turn off your laptop and try to restart your computer. If the reboot On your laptop does not seem to solve the problem, there are a few other tricks that you can try to get the keyboard to work again.

Saturday, 9 January 2016

How to Install Belt HP Designjet 5000 Series


Designjet 5000 Series


How to replace the belt without having to unplug and remove the Trailing Cable Carriage. follow the steps below :

Wednesday, 6 January 2016

How to Reset Printer Epson LQ 2190

Epson LQ-2190


Printer Epson LQ 2190. is generally used in an agency or factories often print a document with the continuous paper.

Printers of this type usually used by finance or accounting to print documents. The use of this printer is also often found in office taxes.

If the printer is used continuously all day without stopping will result in an error so that the printer lights flash, but there was no response to print, the paper would not be interested. And a dialog box appears that says that this printer error. 

Wednesday, 16 December 2015

How to fix windows not genuine

If your windows is not genuine, you will get error message “this copy of windows is not genuine“. Solving this problem is very easy by using command prompt.

After installing windows 7 build 7601 or any version of windows, it will run for one month or two months after that we get problems like often getting error message “this copy of windows is not genuine” and getting blank screen.

The method which has given in this article must work for windows 7 32 bit and 64 bit version.

Just follow below steps for windows 7 not genuine fix and enjoy error free windows 7.

Procedure to fix “This copy of windows is not genuine” error

1. Click on start menu.

2.Type cmd in search field.

3.Right click on cmd file and click on Run as Administrator.It is must to run command prompt with administrator privileges.

Saturday, 12 December 2015

How to fix Epson printers error messages

A printer error has occured
Printer ink pads are at the end of their service life. Please contact Epson support
Waste ink pad in the printer is saturated
Parts have come to the end of their life

A printer error has occured


Some day you can see the error message on the screen of your printer. Such printers as Epson Artisan 700, Artisan 710, Artisan 720, Artisan 800, Artisan 810, Artisan 820, Artisan 830, Artisan 835, TX700, TX710, TX720, TX800, TX810, PX700, PX710, PX800, PX810, PX820 and other have built in monitor-screen.
This error is determined in the Epson Service Manual as FATAL ERROR. It means the printer can't finish his selftest. When you turn the power ON the printer begin to check its all systems. If for some reason it cant finish this selftest - the printer gives error message. It means you have to fix the problem first. If the selftest is finished the printer is ready to print.

Solution

Make sure the transportation lock has been removed.
Store the transportation lock as shown below.


If the CD tray is in the eject position, make sure you press the CD Tray button to retract the tray to the storage position. Never push or pull the CD tray into position.
Turn the Artisan OFF and make sure paper is not jammed inside the unit.

Masalah Pada Motherboard

Gejala :
Setelah dihidupkan, tidak ada tampilan di monitor, lampu indikator (led) di panel depan menyala, lampu indikator (led) monitor berkedip-kedip, kipas power supply dan kipas procesor berputar, tidak ada suara beep di speaker.
Solusi
Langkah pertama lepas semua kabel power yang terhubung ke listrik, kabel data ke monitor, kabel keyboad/mouse, dan semua kabel yang terhubung ke CPU, kemudian lepas semua sekrup penutup cashing. Dalam keadaan casing terbuka silahkan anda lepaskan juga komponen-komponen lainnya, yaitu kabel tegangan dari power supply yang terhubung ke Motherboard, harddisk, floppy, hati-hati dalam pengerjaannya jangan terburu-buru. Begitu juga dengan Card yang menempel pada Mboard (VGA, Sound atau Card lainnya). Sekarang yang menempel pada  cashing hanya MotherBoard saja. Silahkan anda periksa Motherboadnya dengan teliti, lihat Chip (IC), Elko, Transistor dan yang lainnya apakah ada yang terbakar.
Jika tidak ada tanda-tanda komponen yang terbakar kemungkinan Motherboard masih bagus, tapi ada kalanya Mboard tidak jalan karena kerusakan pada program yang terdapat di BIOS.

Friday, 27 August 2010

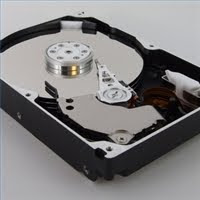
How to Recover a Bad Hard Disk

Hard drives contain the data on almost every computer made for the last 20 years. Prior to that, most computers stored their data on floppy disks, magnetic tapes or even punched cards. Drive capacity has increased exponentially while prices have continued to drop, allowing most modern computers to hold vast amounts of information. When a hard drive crashes, it usually takes all that information with it. Recovering that information can range in importance from helpful to critical, depending upon what was stored. When a back-up is not available, data recovery comes into play.


Narrow Down the Problem


1. Boot the computer and enter into the BIOS setup screen. The particular key used varies by system, but it is often the Delete, F2 or F10 key. Watch for an indication of which key to press on the first screen that appears after turning on the power.

2. Check the hard drive information in the BIOS to make sure that the computer is recognizing the hard drive for the proper capacity. This varies by manufacturer, but is often found under "Standard Options," where the hard drives, floppy drives, system memory, date and time are stored. Make sure the information listed for the hard drive matches the installed hard drive information as found on the label.

3. Detect the hard drive using the autodetection feature of the BIOS set-up program. This will vary by computer, but it is often a matter of pressing "Enter" when the cursor is located on the primary hard drive location.

4. Save changes to the BIOS setup and reboot. If the system still doesn't recognize the hard drive, power down and replace the data cable with a spare cable to see if it is a bad cable causing the problems.

5. Reboot the computer to see if the hard drive is now working. Use a Second Computer for Data Recovery.

6. Attach the hard drive to a second computer as a secondary drive. This can be done by powering down the secondary computer and hooking up the power cable and then attaching the data cable to a spare SATA port on the motherboard, or in the case of IDE drives, connecting the drive to the data cable that goes to the CD ROM drive.

7. Boot the computer and check to see if the hard drive shows up as a new device under the operating system. This will vary by operating system, but as an example, in Windows XP, this can be done by opening "My Computer" and looking for local hard disks.

8. Perform a full back-up or copy important files, storing the recovered information onto an external source such as the C: drive of the host computer, a network location or onto an external device such as an external USB hard drive or flash drive.

9. Run the error checking utility on the hard drive by opening My Computer and right-clicking on the drive, then selecting "Tools" and clicking on "Check Now" in the error checking section if the data is still not accessible.

10. Install a data recovery program or contact a data recovery specialist if these steps do not work or if the information on the hard drive is extremely valuable.

Tuesday, 24 August 2010

How to Terminate a CAT 5E Cable

Computer retailers typically charge high prices for a simple CAT 5E cable that you could make on your own for a few dollars. It's a much better idea to learn how to make your own---homemade CAT 5E network cables will save you money. All you need to "terminate"---really just another way of saying "make"---a CAT 5E cable of your own is some bulk wire, which you can buy at a hardware store or order over the Internet; an RJ-45 connector; a wire stripping tool; and a crimping tool. 1. Score the cable casing about two inches from the end. Be gentle---you don't want to cut through the twisted wire pairs inside the casing.
2. Pull the outer casing off the cable's end to reveal the twisted pairs of wires inside. There should be four twisted pairs: blue and blue-striped; brown and brown-striped, green and green-striped, and orange and orange-striped. Some cables won't have stripes on the second paired wire, leaving it white instead.
3. Unwind the twisted pairs for the two inches of revealed wire so that you get eight wires.
4. Line up the untwisted wires in accordance with the type of wire you'd like to create. The most common type of wire uses this order: green-striped, green, orange-striped, blue, blue-striped, orange, brown-striped, brown.
5. Pick up the wires and hold them tightly between your thumb and forefinger, so that they rest in a flat array with each wire touching the next.
6. Trim the end of the arrayed wires with the crimping tool so that the wires can fit into the RJ-45 connector correctly.
7. Insert the wires---double-checking that they're still in the right order---into the back side of the RJ-45 connector with the clip facing down, and push the wires to come through its front.
8. Insert the RJ-45 connector into the crimping tool and crimp the wires onto the connector. In the process this will also cut any excess length that was left over.
9. Repeat each step on the opposite end of the wire, and you've got a terminated CAT 5E network cable.

How to Set up a Linksys Wireless Router

It's not always easy to set up a wireless router with a Windows client. Linksys routers come with a step-by-step Setup Wizard which makes setup and configuration easy to understand. Once the initial setup is complete, it's simple to customize the configurations. Set up a Linksys Wireless Router
1. Choose and purchase a Linksys router, taking into account your budget and computing habits.
2. Attach the antennas to the Linksys wireless router.
3. Place the router in a central location, making sure it's not surrounded by metal. (A signal can't be obtained through metal.) The router should be located so that the distance between clients (computers) is somewhat equal. This will create a better connection.
4. Plug the Ethernet cable into the "Internet" port on the back of the Linksys router.
5. Connect a computer to the router by plugging another Ethernet cable into the Ethernet port on your computer and attaching the other end to one of the available ports on the back of the router. You can choose any port except the one labeled "WAN."
6. Plug the router into an electrical outlet.
7. Wait for the power light to stop flashing, at which time the router is finished booting up. While the router is booting, the power light will be blinking. This process may take a few minutes to complete.
8. Reboot your computer so it can access a new IP address from the router through the Dynamic Host Configuration Protocol (DHCP).

Configure the Router
1. Open your web browser, type " http://192.168.1.1/ " into the address bar and hit "Enter."
2. Use "Admin" as the username in the pop-up box and leave the password blank.
3. Connect to the Internet and click on "Internet Setup."
4. Select your connection type from the drop-down menu. Choose "DHCP" for cable modems or "PPPoE" for most DSL modems. If you are unsure of these options, check with your ISP.
5. Set a service set identifier (SSID) to identify the router and change the password.
6. Encrypt your wireless connection using a Wireless Encryption Protocol (WEP) key. Under the "Wireless Security" option, enter a passphrase and click "Generate." This will generate a password which will need to be used by any client connecting to your router.

Saturday, 24 July 2010

How To Change A Cmos Battery

First the safety rules

The inside of a computer is a bad place full of electricity and sharp edges.
On the electricity side always when working on you computer make sure that it’s still plugged in to the power socket and the power is turned off, this is to ensure that any static
From you is discharged through the earth. The inside of most computer cases are unfinished metal and has very sharp edges so be careful.

The first signs of a battery failing are:
1) your clock starts running slowly
2) when you boot (start) your computer it has a problem finding your hardware (no hard drive, no cd rom)

To change the battery you need the following tools

1) a X-point screwdriver
2) an anti-static strap(optional)
3) a new battery (seems logical)

Then unplug all the cables from the back of the computer as you remove them make a note where they came from. (So when you finished you can put them back)

Move the computer somewhere where you can work on it with ease

Remove the cover by locating the screws around the outer edge (back) of the computer
Some computer cases only require you to remove 2 screws on one side then a panel can be removed allowing you access to the computers insides, others you must remove 6 screws and remove the whole case by sliding it to the rear and lifting it off.

Now make sure that you read the safety instructions about static.
Look inside you will see a round silver thing that looks about the size of a 10p piece (quarter). This is the battery itself, carefully lift the retaining clip and slide the battery out. That’s it removed now go to your local computer retailer, electrical retailer (Tandy/Radio shack) taking the old battery with you and get a new battery.

Back to your computer insert the new battery by lifting the clip and sliding the battery in.

Reinstall your case and plug all the cables back (you did remember to label them didn’t you)

Now for the fun part.

You will now need to go into you bios….

Right the bios is the god of your computer.

To access it, when your computer first starts you will see a black screen with white text.

If you look carefully you will see a line that says something like "press del for setup" or some other key (F2 or ESC or tab) this will take you to god's house where you can make lots of changes to the way your machine works.

It is also the place where you can make your nice computer in to a rather expensive door stop so be careful and don’t go playing with anything.

You will now be presented with a blue screen with a lot of options on it,
The one we want is load optimised/default settings.

Press the F10 key and type y the computer should now reboot.

If every thing went well then your computer will now be up and running.

Shizers way: Keep computer running. Lay it on it's side and remove side cover to expose MoBo. Take any thin object, "small screwdriver, knife point, wood shiskabob skewer. Pull back the battery retaining clip. Toss the old battery in the junk recepticle, unless you belong to greenpeace and want to save the earth. Install the new battery. No need to reset bios becasue the compter supplies voltage to the cmos while it is running. Reset or resync clock with internet. Done!
Related Posts Plugin for WordPress, Blogger...

pasang

These Advertise Are At Your Finger Tip, Just One Needs To Dial The Mentioned Contact Number. Or can Email