 |
| Designjet 5000 Series |
How to replace the belt without having to unplug and remove the Trailing Cable Carriage. follow the steps below :
Turn off the first printer and unplug the power cord from the power source
Open the cover to the left to pull out beforehand Ink Cartridges.

Open the lid and remove the back cover Electrical Cable and Air Tube.

Further off Ink Cartridge Tube Connector (Assembly) by turning the third lock to the left or on the next just pull out.

Removing the encoder strip by removing the bolts first.

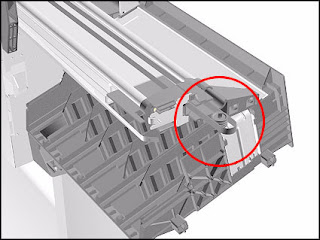
By using a screwdriver, turn the screw fasteners towards the right as much as possible until the belt tension slacken.

Push the carriage to the left until it can no longer be driven (fixed).
Remove the end of the belt to the right of Belt Tensioner (no need to open the cover right) with the fingers up off (if it still feels hard loosen again by turning the screw fastening until the belt can be released).
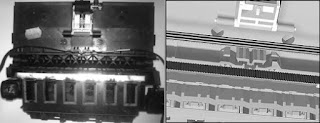
Remove the end of the belt to the left at the same time sticking a belt wheel.
With the lowered position / squat, pull the belt from the bottom of the carriage with caution if necessary take a photo with a camera to guide later in order not to forget the correct position when the belt is attached.
Once separated from the carriage, pull the belt out slowly.
Take the new Belt and enter through the hole where the wheel belt, leaving the left end of the belt to be mounted on wheels.
Attach the belt under carriage with completely forgetting to look back at the last photo taken.
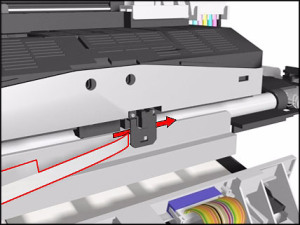
Attach the end of the belt to the left on the wheel and replace the wheel on the stand. With the position of the left end of the belt is attached to the wheel, pull the belt ends of the right and input / attach to Belt Tensioner (at this stage it is rather difficult so have a little patience).
Once the belt is attached properly at both ends and then move the carriage to the center position
Tighten the belt by turning the screw fasteners to the left until you hear a creaking sound has a maximum rotation mark.
Replace the encoder strip by first checking the position encoder strip should be in the new sensor encoder encoder tip into the hole and cover with bolt and tighten (if difficult to put the encoder, press the iron plate first).
Replace Ink Cartridge Tube Connector (Assembly) on the back and turn the lock lever to the right. Attach Electrical Cable and Air Tube. Close the back cover and attach and tighten the bolt. Insert Ink Cartridges one by one. Plug the power cord and turn on the printer.

No comments:
Post a Comment